Showing posts with label cooking. Show all posts

Saturday, June 27, 2009

Daring Baker: Bakewell Tart (or Pudding)

The June Daring Bakers' challenge was hosted by Jasmine of Confessions of a Cardamom Addict and Annemarie of Ambrosia and Nectar. They chose a Traditional (UK) Bakewell Tart... er... pudding that was inspired by a rich baking history dating back to the 1800's in England.

I thought this was pleasing challenge. Not too complicated, but I thought it was tasty. Hubbs, on the other hand, did not.

I decided to make some Lemon Curd to fill my tart. While cooking the Lemon Curd I imagined the conversation I would have with Hubbs about the taste of the finished Tart.

Luna: What do you think?
Hubbs: It is a bit Tart.
Luna: It is supposed to be, it is a tart!

The actual conversation was nothing like that. I served the tart to a few ladies I had over at my house. Later after they left I offered a piece to Hubbs.

Luna: Would you like to try a piece?
Hubbs: ummmm...well....uhhh. I think I need to know more about it.
Luna: It has sugar, almond, egg, lemon, butter, flour. You like all those ingredients.
Hubbs: Um...uh...I guess.
*30 min later and only one bite missing*
Luna: Do you not like it?
Hubbs: (not wanting to say no and hurt my feelings he take another pathetically tiny bite) I think I don't like the texture.
Luna: which layer?
Hubbs: There are layers?
Luna: (sneering) yes!
Hubbs: I just don't think I have had much of this sort of cake.
Luna: (still sneering) it's a TART!

Needless to say, Hubbs did not like it. But I think it might have been the Lemon Curd, not sure! He doesn't like sour or tart things. I, however, LOVE it. And since I was making it, and it is summer time, and I happen to have a few lemons I thought a nice fresh lemon curd would be great!

The Curd turned out great. It was a bit thin, but the kitchen was getting WAY too hot and it was WAY too hot outside, so I stoped at a "good enough" thickness.


The pastry crust was a different story. It all looked good until i tried to pick it up to place it in the dish. It completely fell apart. So I just ended-up piecing it together in the dish and molding it to the dish. (oh well!)

The frangipane seemed to go well. I have never made one before, so what do I know. Maybe it was all wrong too.


I guess it doesn't much matter because everyone, except for Hubbs, seemed to like it. It did get a bit too brown for my liking in the oven around the edge, mainly the crust. So I trimmed that up a bit.

Before trimming


After trimming


Ta-da!


History Lesson we receive on the Bakewell Tart/Pudding issue

Bakewell Tart History and Lore

Flan-like desserts that combine either sweet egg custard over candied fruit or feature spiced ground almonds in a pastry shell have Mediaeval roots. The term “Bakewell pudding” was first penned in 1826 by Meg Dods; 20 years later Eliza Acton published a recipe that featured a baked rich egg custard overtop 2cm of jam and noted,

“This pudding is famous not only in Derbyshire, but in several of our northern counties where it is usually served on all holiday occasions.”

By the latter half of the 1800s, the egg custard evolved into a frangipane-like filling; since then the quantity of jam decreased while the almond filling increased.

This tart, like many of the world's great foods has its own mythic beginnings…or several mythic beginnings. Legend has it in 1820 (or was it in the 1860s?) Mrs. Greaves, landlady of The White Horse Inn in Bakewell, Derbyshire (England), asked her cook to produce a pudding for her guests. Either her instructions could have been clearer or he should have paid better attention to what she said because what he made was not what she asked for. The cook spread the jam on top of the frangipane mixture rather than the other way around. Or maybe instead of a sweet rich shortcrust pastry case to hold the jam for a strawberry tart, he made a regular pastry and mixed the eggs and sugar separately and poured that over the jam—it depends upon which legend you follow.

Regardless of what the venerable Mrs. Greaves’ cook did or didn’t do, lore has it that her guests loved it and an ensuing pastry-clad industry was born. The town of Bakewell has since played host to many a sweet tooth in hopes of tasting the tart in its natural setting.

Bakewell tarts are a classic English dessert, abounding in supermarket baking sections and in ready-made, mass-produced forms, some sporting a thick sugary icing and glazed cherry on top for decorative effect.

Enjoy it with a cup of tea or coffee or just eat it sneaky slice by sneaky slice until, to your chagrin, you realise the whole tart has somehow disappeared despite you never having pulled out a plate, fork or napkin with which to eat it.

Is it a tart or is it a pudding?

Someone once said something like “The Bakewell pudding is a dessert. The Bakewell tart is that girl over there.”

It’s a debate that rages on and we aren’t taking sides on this one. But we will say that many people call this pudding a tart.

While we’re at it...
The etymology of pudding is a rather interesting and slightly convoluted one.* The naming confusion may come from the British manner of referring to the dessert course as ‘pudding’ (as well as referring to fat babies by the same name, though we don’t think that is what was the inspiration in this case). And so any dessert is a pudding until another name comes along and adds clarity to what it really is.

The Lemon Curd recipe I used I git off JoyofBaking.com

3 Large Eggs
1/3 Cup fresh lemon juice (about 2-3 lemons, don't use bottled juice)
1 tablespoon fine lemon zest
3/4 cup granulated sugar
4 tablespoons unsalted butter at room temp. (cut into small pieces is helpful)

In a stainless steel bowl placed over a saucepan of simmering water, whisk together the eggs, sugar, and lemon juice until blended. Cook, stirring constantly (to prevent it from curdling), until the mixture becomes thick (like sour cream or a hollandaise sauce) (160 degrees F or 71 degrees C). This will take approximately 10 minutes. Remove from heat and immediately pour through a fine strainer to remove any lumps. Cut the butter into small pieces and whisk into the mixture until the butter has melted. Add the lemon zest and let cool. The lemon curd will continue to thicken as it cools. Cover immediately (so a skin doesn't form) and refrigerate for up to a week.

Makes 1 1/2 cups (360 ml).

If you want a lighter lemon curd whip 1/2 cup (120 ml) of heavy whipping cream and fold into the lemon curd.


The recipe as I received it.

Makes one 23cm (9” tart)
Prep time: less than 10 minutes (plus time for the individual elements)
Resting time: 15 minutes
Baking time: 30 minutes
Equipment needed: 23cm (9”) tart pan or pie tin (preferably with ridged edges), rolling pin

One quantity sweet shortcrust pastry (recipe follows)
Bench flour
250ml (1cup (8 US fl. oz)) jam or curd, warmed for spreadability
One quantity frangipane (recipe follows)
One handful blanched, flaked almonds

Assembling the tart
Place the chilled dough disc on a lightly floured surface. If it's overly cold, you will need to let it become acclimatised for about 15 minutes before you roll it out. Flour the rolling pin and roll the pastry to 5mm (1/4”) thickness, by rolling in one direction only (start from the centre and roll away from you), and turning the disc a quarter turn after each roll. When the pastry is to the desired size and thickness, transfer it to the tart pan, press in and trim the excess dough. Patch any holes, fissures or tears with trimmed bits. Chill in the freezer for 15 minutes.

Preheat oven to 200C/400F.

Remove shell from freezer, spread as even a layer as you can of jam onto the pastry base. Top with frangipane, spreading to cover the entire surface of the tart. Smooth the top and pop into the oven for 30 minutes. Five minutes before the tart is done, the top will be poofy and brownish. Remove from oven and strew flaked almonds on top and return to the heat for the last five minutes of baking.

The finished tart will have a golden crust and the frangipane will be tanned, poofy and a bit spongy-looking. Remove from the oven and cool on the counter. Serve warm, with crème fraîche, whipped cream or custard sauce if you wish.

When you slice into the tart, the almond paste will be firm, but slightly squidgy and the crust should be crisp but not tough.

Jasmine’s notes:
• If you cannot have nuts, you can try substituting Victoria sponge for the frangipane. It's a pretty popular popular cake, so you shouldn't have any troubles finding one in one of your cookbooks or through a Google search. That said, our dear Natalie at Gluten a Go Go has sourced some recipes and linked to them in the related alt.db thread.
• You can use whichever jam you wish, but if you choose something with a lot of seeds, such as raspberry or blackberry, you should sieve them out.
• The jam quantity can be anywhere from 60ml (1/4 cup) to 250ml (1cup), depending upon how “damp” and strongly flavoured your preserves are. I made it with the lesser quantity of home made strawberry jam, while Annemarie made it with the greater quantity of cherry jam; we both had fabulous results. If in doubt, just split the difference and spread 150ml (2/3cup) on the crust.
Annemarie’s notes:
• The excess shortcrust can be rolled out and cut into cookie-shapes (heck, it’s pretty darned close to a shortbread dough).

Sweet shortcrust pastry

Prep time: 15-20 minutes
Resting time: 30 minutes (minimum)
Equipment needed: bowls, box grater, cling film

225g (8oz) all purpose flour
30g (1oz) sugar
2.5ml (½ tsp) salt
110g (4oz) unsalted butter, cold (frozen is better)
2 (2) egg yolks
2.5ml (½ tsp) almond extract (optional)
15-30ml (1-2 Tbsp) cold water

Sift together flour, sugar and salt. Grate butter into the flour mixture, using the large hole-side of a box grater. Using your finger tips only, and working very quickly, rub the fat into the flour until the mixture resembles bread crumbs. Set aside.

Lightly beat the egg yolks with the almond extract (if using) and quickly mix into the flour mixture. Keep mixing while dribbling in the water, only adding enough to form a cohesive and slightly sticky dough.

Form the dough into a disc, wrap in cling and refrigerate for at least 30 minutes

Jasmine’s notes:
• I make this using vanilla salt and vanilla sugar.
• If you wish, you can substitute the seeds of one vanilla bean, one teaspoon of vanilla paste or one teaspoon of vanilla extract for the almond extract

Frangipane

Prep time: 10-15 minutes
Equipment needed: bowls, hand mixer, rubber spatula

125g (4.5oz) unsalted butter, softened
125g (4.5oz) icing sugar
3 (3) eggs
2.5ml (½ tsp) almond extract
125g (4.5oz) ground almonds
30g (1oz) all purpose flour

Cream butter and sugar together for about a minute or until the mixture is primrose in colour and very fluffy. Scrape down the side of the bowl and add the eggs, one at a time, beating well after each addition. The batter may appear to curdle. In the words of Douglas Adams: Don’t panic. Really. It’ll be fine. After all three are in, pour in the almond extract and mix for about another 30 seconds and scrape down the sides again. With the beaters on, spoon in the ground nuts and the flour. Mix well. The mixture will be soft, keep its slightly curdled look (mostly from the almonds) and retain its pallid yellow colour.

Annemarie’s notes:
• Add another five minutes or more if you're grinding your own almonds or if you're mixing by hand (Heaven help you).

Sunday, June 14, 2009

Daring Cook: Potstickers

Chinese dumplings/potstickers (aka gyoza in Japanese) Thank you Jen from use real butter for hosting the Daring Cooks June 2009 challenge.
I have wanted to learn how to make potstickers for such a LONG time. I was so excited by this challenge. Thank you, thank you, thank you!

I have to say, my finished product was not very pretty, but they tasted good, AND I had fun. It took a long time to get them all done.

I started by making the wrapper dough. AS it was resting I began to make the filling. I used a little bit of this and a little bit of that. Basically I just opened the fridge, freezer, and pantry and found what I could use up.

I used some ground pork, carrots, spinach, garlic, egg, soy sauce, sesame oil, cornstarch. Maybe some other things too. I did it in a frenzy, so I don't much remember what I was throwing in there. From the picture it looks like I also added some teriyaki sauce, chardonnay salt, cilantro bullion and onion bullion. I then began to roll out the wrappers. Then used a Tablespoon to scoop the filling into the wrapper.
I began to fold them. It took a bit to get the hang of it. It took awhile to get the wrappers thin enough. I played with a couple of different ways to fold them up. Some worked better than others.
I froze these dumplings to use at a later time. Here they are after freezing individually, but before I bagged them.
A few days later I did finally cook some up for dinner. I made a simple dipping sauce with soy sauce, sesame oil.
I thought they turned out a bit salty, Hubbs thought the dipping sauce was salty. Regardless, they were pretty good.

After I had used-up all the pork filling I still had a good amount of wrapper dough left. So I decided to try something fun. I thought about a dessert filling, but honestly at that moment I was hungry and wanted something savory.

I took some cottage cheese and drained it a bit. Added cilantro and a little cornmeal. (the cornmeal was to thicken it up a bit.)
I made the dumplings, pan fried them and served them with som avacado and lemon. They were SOOOOOOOO good. I think the best thing I have eaten in a long time. Granted, I may have been really hungry, but I think they were just really good.


The Recipe as I received it.

It's a basic concept: a filling inside a dough wrapper, sealed, and cooked. This delicious theme runs through many cultures and is among the more popular bites at Chinese restaurants - especially dim sum. The recipe I provide is based on my family recipe. There is a lot of wiggle room and I encourage you to explore. If you've made them before - great! Now try something different!

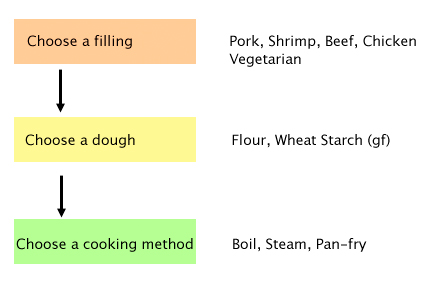
The process goes a little like this:

You can (and should) reference instructional photos and discussion on my blog post here.

Wrappers: Well yes, you could purchase pre-made dumpling wrappers at the store (NO WONTON WRAPPERS - they have egg), but they are inferior compared to homemade. The whole point of this challenge is to make the dumpling wrappers by hand. So here is the one requirement: the dumpling wrappers must be made by hand. It isn't all that hard, it just takes a little time and practice. People usually get the hang of it after making about a dozen. **NOTE: I have a special recipe for gluten-free dumpling wrappers at the bottom of the post. They are another type of traditional dumpling and they are pretty awesome (although more finicky). Really delicious too, so you may want to have a looksee even if you aren't gluten-free. [EDIT 5/18/09:] I see that some have chosen to make the wrappers by hand. I don't recommend this method because the wrappers will be too thick and probably yield far fewer dumplings for the dough recipe. The point of rolling the dough is for uniformity of wrapper and to achieve a thickness that is otherwise difficult to attain by hand. Also, rolling is much faster than hand shaping. We're aiming for a delicate skin that does not dominate the dumpling.

Fillings: the beauty of the Chinese dumpling/potsticker is that the filling is very versatile. That's why there are so many different kinds of dumplings when you go to dim sum. The two most common are pork and shrimp. You can make them with other ground meats (beef, chicken...) or vegetarian (tofu, mushrooms, bamboo shoots, water chestnuts, glass noodles, Chinese chives - oh yum!). The important thing to keep in mind is that the filling needs to "stick" to itself or else you will make your life incredibly miserable wrapping up filling that keeps falling apart. I think if I were to make vegetarian dumplings, I would sauté the cabbage and mash up the tofu for a better cohesiveness. It's up to you how you want to fill your dumplings and I say - run with it! Just keep it cohesive and no big chunks of hard ingredients (they poke through the wrapper dough = disaster). I realize it may be tempting to dump all of the vegetables into a food processor and give it a whir, but I caution against it. You don't want a slurry, you want a mince. Practice your knife skills and be careful.

Special Equipment: A rolling pin - preferably not tapered. (see blog pictures for the type I use).

Time: Prep for the filling takes me 30 minutes - longer if peeling and de-veining shrimp. It will depend on your proficiency with a good sharp knife. Rolling and wrapping several dozen dumplings takes me 1 hour by myself. My parents can crank through it in 30 minutes when one person is rolling wrappers and the other is wrapping dumplings. Might be fun to get a second person to help! Cooking: I have to cook mine in batches. When steaming, I can cook a dozen at a time in about 10 minutes. Potstickers: 15 minutes per 2 dozen determined by the size of your pan. Boiling - 6 minutes per dozen or so depending on size of pot. My own personal preference is for potstickers - mmmmm! But they are ALL good. Here is the recipe:

Chinese Dumplings/Potstickers

pork filling:
1 lb (450g) ground pork
4 large napa cabbage leaves, minced
3 stalks green onions, minced
7 shitake mushrooms, minced (if dried - rehydrated and rinsed carefully)
1/2 cup (75g) bamboo shoots, minced
1/4 (55g) cup ginger root, minced
3 tbsp (40g) soy sauce
2 tbsp (28g) sesame oil
2 tbsp (16g) corn starch

OR

shrimp filling:
1/2 lb (225g) raw shrimp, peeled, deveined, and coarsely chopped
1/2 lb (225g) ground pork
3 stalks green onions, minced
1/4 cup (55g) ginger root, minced
1 cup (142g) water chestnuts, minced
1 tsp (5g) salt
3 tbsp (40g) sesame oil
2 tbsp (16g) corn starch

dough: (double this for the amount of filling, but easier to make it in 2 batches - or just halve the filling recipe)
2 cups (250g) all-purpose flour
1/2 cup (113g) warm water
flour for worksurface

dipping sauce:
2 parts soy sauce
1 part vinegar (red wine or black)
a few drops of sesame oil
chili garlic paste (optional)
minced ginger (optional)
minced garlic (optional)
minced green onion (optional)
sugar (optional)

Combine all filling ingredients in a large mixing bowl and mix thoroughly (I mix by clean hand). Cover and refrigerate until ready to use (up to a day, but preferably within an hour or two).

Make the dough, Method 1: Place the flour in the work bowl of a food processor with the dough blade. Run the processor and pour the warm water in until incorporated. Pour the contents into a sturdy bowl or onto a work surface and knead until uniform and smooth. The dough should be firm and silky to the touch and not sticky.[Note: it’s better to have a moist dough and have to incorporate more flour than to have a dry and pilling dough and have to incorporate more water).

Make the dough, Method 2 (my mom’s instructions): In a large bowl mix flour with 1/4 cup of water and stir until water is absorbed. Continue adding water one teaspoon at a time and mixing thoroughly until dough pulls away from sides of bowl. We want a firm dough that is barely sticky to the touch.

[EDIT: 5/26/09] There have been two complaints posted about a dry dough and I realize that this rests in the problem of measuring flour which has a different density and hence weight for 2 cups depending on how you scoop it. That is why I also list the weight: 250g. Flour tends to settle over time, so when I scoop it out, I shake several cups' worth back into the container before taking a final scoop of soft, fluffy, flour and I get 250g for 2 cups. When you knead the dough, if it feels hard and dry, then you can add more water. [Warning: it will NOT be a soft bread dough, so don't expect it to be, but it shouldn't be a brick either.] It is perfectly fine to use more than the 1/2 cup listed in the recipe as everyone's climate and flours vary. Use your judgment - this is what being a Daring Cook is about. We are trying to cultivate a sense of intuition so that recipes are general guidelines from which you can expand your own style.

Both dough methods: Knead the dough about twenty strokes then cover with a damp towel for 15 minutes. Take the dough and form a flattened dome. Cut into strips about 1 1/2 to 2 inches wide. Shape the strips into rounded long cylinders. On a floured surface, cut the strips into 3/4 inch pieces. Press palm down on each piece to form a flat circle (you can shape the corners in with your fingers). With a rolling pin, roll out a circular wrapper from each flat disc. Take care not to roll out too thin or the dumplings will break during cooking - about 1/16th inch. Leave the centers slightly thicker than the edges. Place a tablespoon of filling in the center of each wrapper and fold the dough in half, pleating the edges along one side (see images in post for how to fold pleats). Keep all unused dough under damp cloth.

To boil: Bring a large pot of water to a boil and add dumplings to pot. Boil the dumplings until they float.

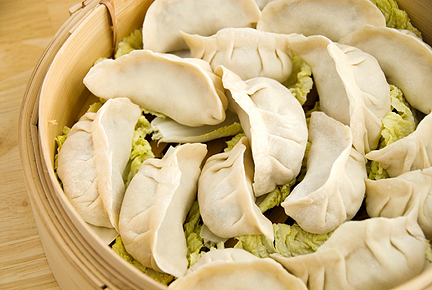
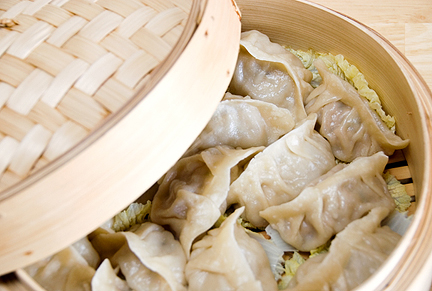
To steam: Place dumplings on a single layer of napa cabbage leaves or on a well-greased surface in a steamer basket with lid. Steam covered for about 6 minutes.

placing the dumplings in a steamer over napa cabbage leaves

steamed and ready to eat

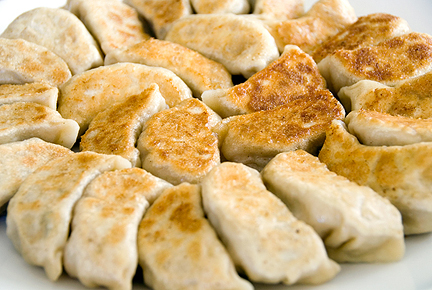
To pan fry (potstickers): Place dumplings in a frying pan with 2-3 tbsp of vegetable oil. Heat on high and fry for a few minutes until bottoms are golden. Add 1/2 cup water and cover. Cook until the water has boiled away and then uncover and reduce heat to medium or medium low. Let the dumplings cook for another 2 minutes then remove from heat and serve.

potstickers, bottoms up to show off the crunchies

To freeze: Assemble dumplings on a baking sheet so they are not touching. It helps to rub the base of the dumpling in a little flour before setting on the baking sheet for ease of release. Freeze for 20-30 minutes until dumplings are no longer soft. Place in ziploc bag and freeze for up to a couple of months. Prepare per the above instructions, but allow extra time to ensure the filling is thoroughly cooked.

To serve: Serve dumplings or potstickers hot with your choice of dipping sauce combinations.

Monday, April 27, 2009

Daring Baker: Cheesecake

The April 2009 challenge is hosted by Jenny from Jenny Bakes. She has chosen Abbey's Infamous Cheesecake as the challenge.
Photobucket

This is my first Daring Baker Challenge. I am very excited about it. Luckily it is something Hubbs is actually willing to eat, or at least try. I happen to LOVE cheesecake as well.

I had lots of fun with this one, and one TERRIBLE accident.

I started by making the crust.

Then I began to make the actual Cheesecake.

I then filled the pan
It was at this point that things went a little wonky! I am not exactly sure how it happened, but one moment I was taking the above picture and the next I was fishing the camera out of the camera out of the pan. I really have no idea how it happened. But it kinda threw my groove off. Luckily the camera stilled worked after I cleaned it up a bit. (by worked I mean it turned on and took pictures. It took about 2-3 days for the lens to open and close properly and I had to clean the lens every time I wanted to use the camera, and by cleaning a bit I mean I took a break from Cheesecake for about 20 min trying to figure out how to get the white creamy goopy goodness out of every crack and crevice on the camera)

Because of the camera mishaps I stopped all photo taking until the cake was done, SO sorry I do not have pictures of the next little bit.

I decided not to do a water bath because I knew water would leak into my springform pan. So I decided to try a couple of different things. I found many places online that talked about using a steam bath instead of a water bath with cheesecake. SO I went with that option, but I also added my own idea. I have some baking strips from my cake decorating days. I know they are meant to help cakes to come out even and prevent cracking. The water bath is to help cheesecake from cracking. I gave it a try. It worked.

I thought the camera had a hard enough day, so i gave it a rest and took pictures the next day. Here they are.
We really liked it.


The Recipe in case you want it!
Abbey's Infamous Cheesecake:

crust:
2 cups / 180 g graham cracker crumbs
1 stick / 4 oz butter, melted
2 tbsp. / 24 g sugar
1 tsp. vanilla extract

cheesecake:
3 sticks of cream cheese, 8 oz each (total of 24 oz) room temperature
1 cup / 210 g sugar
3 large eggs
1 cup / 8 oz heavy cream
1 tbsp. lemon juice
1 tbsp. vanilla extract (or the innards of a vanilla bean)
1 tbsp liqueur, optional, but choose what will work well with your cheesecake

DIRECTIONS:
1. Preheat oven to 350 degrees F (Gas Mark 4 = 180C = Moderate heat). Begin to boil a large pot of water for the water bath.

2. Mix together the crust ingredients and press into your preferred pan. You can press the crust just into the bottom, or up the sides of the pan too - baker's choice. Set crust aside.

3. Combine cream cheese and sugar in the bowl of a stand-mixer (or in a large bowl if using a hand-mixer) and cream together until smooth. Add eggs, one at a time, fully incorporating each before adding the next. Make sure to scrape down the bowl in between each egg. Add heavy cream, vanilla, lemon juice, and alcohol and blend until smooth and creamy.

4. Pour batter into prepared crust and tap the pan on the counter a few times to bring all air bubbles to the surface. Place pan into a larger pan and pour boiling water into the larger pan until halfway up the side of the cheesecake pan. If cheesecake pan is not airtight, cover bottom securely with foil before adding water.

5. Bake 45 to 55 minutes, until it is almost done - this can be hard to judge, but you're looking for the cake to hold together, but still have a lot of jiggle to it in the center. You don't want it to be completely firm at this stage. Close the oven door, turn the heat off, and let rest in the cooling oven for one hour. This lets the cake finish cooking and cool down gently enough so that it won't crack on the top. After one hour, remove cheesecake from oven and lift carefully out of water bath. Let it finish cooling on the counter, and then cover and put in the fridge to chill. Once fully chilled, it is ready to serve.

Pan note: The creator of this recipe used to use a springform pan, but no matter how well she wrapped the thing in tin foil, water would always seep in and make the crust soggy. Now she uses one of those 1-use foil "casserole" shaped pans from the grocery store. They're 8 or 9 inches wide and really deep, and best of all, water-tight. When it comes time to serve, just cut the foil away.

Prep notes: While the actual making of this cheesecake is a minimal time commitment, it does need to bake for almost an hour, cool in the oven for an hour, and chill overnight before it is served. Please plan accordingly!

Some variations from the recipe creator:

** Lavender-scented cheesecake w/ blueberries - heat the cup of heavy cream in the microwave or a saucepan until hot but not boiling. Add 2 tbsp of lavender flowers and stir. Let lavender steep in the cream for about 10-15 minutes, then strain the flowers out. Add strained cream to cheesecake batter as normal. Top with fresh blueberries, or make a quick stovetop blueberry sauce (splash of orange juice, blueberries, a little bit of sugar, and a dash of cinnamon - cook until berries burst, then cool)

** Cafe au lait cheesecake with caramel - take 1/4 cup of the heavy cream and heat it in the microwave for a short amount of time until very hot. Add 1-2 tbsp. instant espresso or instant coffee; stir to dissolve. Add this to the remainder of cream and use as normal. Top cheesecake with homemade caramel sauce (I usually find one on the food network website - just make sure it has heavy cream in it. You can use store-bought in a pinch, but the flavor is just not the same since its usually just sugar and corn syrup with no dairy).

** Tropical – add about a half cup of chopped macadamias to the crust, then top the cake with a mango-raspberry-mandarin orange puree.

** Mexican Turtle - add a bar of melted dark chocolate (between 3 and 5 oz., to taste) to the batter, along with a teaspoon of cinnamon and a dash of cayenne pepper (about 1/8 tsp.). Top it with pecan halves and a homemade caramel sauce.

** Honey-cinnamon with port-pomegranate poached pears – replace 1/2 cup of the sugar with 1/2 cup of honey, add about a teaspoon or more (to taste) of cinnamon. Take 2 pears (any variety you like or whatever is in season), peeled and cored, and poach them in a boiling poaching liquid of port wine, pomegranate juice/seeds, a couple of "coins" of fresh ginger, a cinnamon stick, and about a 1/4 cup of sugar. Poach them until tender, then let cool. Strain the poaching liquid and simmer until reduced to a syrupy-glaze consistency, then cool. Thinly slice the cooled pears and fan them out atop the cooled cheesecake. Pour the cooled poaching syrup over the pears, then sprinkle the top with chopped walnuts and fresh pomegranate seeds.

Some variations from Jenny (from JennyBakes):

**Key lime - add zest from one lime to sugar before mixing with cream cheese. Substitute lemon juice, alcohol, and vanilla with key lime juice.

**Cheesecakelets - put in muffin tins, ramekins, or custard cups. Try baking 20-35 minutes, or until still a little jiggly, and cool as before.

Sunday, April 19, 2009

Picky Eater Chronicles: Mission Rainbow

SweetPea is a Picky Eater. I HATE the fact that she is a picky eater. It drives me nuts. I love being adventurous in eating and living with a picky eaters truly thwarts my adventure. And I add a plural to the end of Picky Eaters because Hubbs is Picky too. I would have to say food issues were the biggest challenge at the beginning of our marriage. I hated it when I would take the time to prepare a meal and Hubbs wouldn't touch it. But I have learned what and how to make what he does eat more fun for me. And I do have to say Hubbs is good at picking around stuff. I mean, he has been picking around for over 30 years so he has developed a skill. I just try not to look at his plate because it makes me sad to see all the good stuff in a rejection pile at the edge of his plate.

Anyway, I now, and so does Hubbs, blame his genetic make-up of food pickiness, as the reason for SweetPea being picky. I have tried so many things to try and "break" her of the habit. I just find her will is stronger than mine. I should have realized it when she was a baby and refused to nurse at first. I guess the cards were laid at the beginning. Overall she has liked, at some point, many different foods. Currently, she eats primarily noodles with Parmesan cheese and peanut butter sandwiches.

The main thing I try and do is ALWAYS offer lots of foods AND try and be creative. So the following is my latest failed attempt at diet diversity.

As we were driving to the store I began to lay the foundation for dinner. We were going to have a Rainbow Dinner. I explained we needed to find foods of every color to eat. Food, Glorious Food! of every color!

Red: strawberries and watermelon
Orange: carrots and cantaloupe
Yellow: bananas and corn
Green: grapes and broccoli
Blue: blueberries
Purple: grape juice
I also added Black Olives for another color.

SweetPea makes me laugh because the girl is practically a vegetarian, a raw vegetarian.

I then plans to make a Rainbow Cake. The deal was IF you eat at least one bite of every color (black was not required) then you get to have the rainbow at the end of dinner. It turned out really cute, but it was still a hard sell. Even though she picked out the food, and she helped prepare it ALL she really only ate the watermelon. Then she got whiny, then she began to argue, then she went on time-out for not doing as she was asked and being disrespectful. Then an hour after Hubbs and I finished our rainbow she began to nibble a few things. So I guess I can't call it a complete failure!

Here is my plate
The cake

The directions on how to make the cake a re pretty easy. I first saw the cake as cupcakes on my friends blog (She made it for St Patrick's day.) So I did a Google search for it. I found this woman's directions. I have made cake with diet soda before and I have found it to be a bit more delicate of a cake, meaning it loses some of its durability and become fragile. She is smart and makes the layer WHOLE cakes, so it keeps some of it integrity. I was trying to make a layer cake and cut it. (I did it during a cake decorating class. I was TRYING to cut some calories. I decided to make awful flavor combos instead.) ANYWAY. I thought a bundt cake would make a cute rainbow cake. SO I took her idea and modified it as follows.

The recipe I used is a modification of my Aunt's AMAZING chocolate bundt cake recipe.

1 - package white cake mix
1 - 5.25 oz box of instant vanilla pudding
1C - sour cream (I had to use part sour cream part plain yogurt this time)
1/2C - oil
1/2C - warm water
4 - eggs (I used whole eggs, the yolk didn't yellow the batter too much)

for the colors I used gel food coloring

I mixed it all together.

Then I divided the batter into six parts
I added the food coloring

SweetPea helped mix

I then began to layer the batter into the well grease pan. Since I wanted Red on the "top" I put it in first. The batter is thick so I had to work it around a bit.
I then layered in orange and worked it around, then yellow and worked it around, then green.Blue came next and purple last!
I then baked it at 350* for a little over and hour. The outside got a little dark(I think the temp is off on my oven, I NEED to get a thermometer,) but it wasn't burnt. A burnt bunt would be no good! The colors seemed to come out really nice.
I then frosted the top of the cake for a "cloud" effect. I was planning for whipped topping, but I ended-up using that for something else a couple of nights earlier. So regular ol' white frosting and some marshmellows to add to the cload effect and to help stabilize. A few sprinkles and *poof* a rainbow!

Here is a picture of SweetPea begging to skip a few colors to get to her Rainbow!

Monday, April 13, 2009

Pack it all in

I often have great intentions to do fun things with the kids, but sometimes I just get a little overwhelmed by my own ideas. Then either the time will pass, or I try to cram it all into one fun filled day. Last Friday was just one of those days. I realized I had done nothing with the kids for Easter. So I pulled out some sugar cookie dough I had in the freezer and we made some cookies.

I sometimes find it difficult to balance letting the kids be kids and make messes and have fun, and the idealized movie version I play in my head while setting-up the activity. Poor SweetPea and Bubba. There is no way they can know what my head has made-up. It is a good thing we have fun despite my romanticized notions.

Some how they always know I have something fun planned because they show-up in the preparation stage, which is a bad time to show-up. All you get is "just wait," "don't touch," "hold on," "give me a minute," and "not yet" And I always seem rushed and something ends-up a not quite right. This time, it was the frosting. Some colors I just didn't make enough of, some ended-up soupy (which is weird since it was all made at the same time,) and it was ALL messy.

I of course helped the kids. The story in my head had pretty cookies with perfect icing. HELLO- they are both under 5 (Bubba isn't even 2 yet!) What kid under 5 can hold a pastry bag. When I took a cake decorating class there was a significant number of ADULTS who couldn't figure out the pastry bag. (as a side note, even Martha Stewart has trouble getting the "ideal" response from kids.)

We ended-up with two cookie sheets full of cookies. The first sheet I got just about perfect. They weren't under baked or over baked. If only the second sheet could have been so lucky. I completely forgot about it! At some point things clicked in my head, so I ran for the kitchen. I opened the baby gate and reached for the oven and as i took the next step I realized I was stepping ON something and it was not going to let me maintain my course, which would be on my feet. As I am falling I am praying I do not pull the oven out of the wall on top of myself, cuz not only would it be a mess, and expensive to fix and replace, but it would be HOT. A shower of hot sugar cookies is not what I want at the time. But the oven held and I landed in the trash can instead. It isn't very often that you are thankful to land in the trash! The cookies, amazingly, were still edible. The orange that caused the fall, not as much. (yes, I stepped on and rolled upon an entire unpeeled orange. I am not exactly sure how it ended-up on the kitchen floor, but I have a hunch it has something to do with Bubba.)

Later that evening we dyed eggs. I really try hard to not let the kids in on any planned ideas. I keep them in the dark as much as possible that way everything is a surprised. Not to mention, I don't have to be badgered with a millions questions regarding when something will happen. But sometimes they figure it out. This time boiling eggs was the give away. But somehow they managed to wait for Hubbs to come home.
Hubbs and I decided to do our Easter egg hunt on Saturday morning. I would like to say it is for some noble reason like keeping the Easter Bunny separate from the the religious reason for Easter, but truly, ore reasoning was purely pragmatic. We just have trouble getting the Church on time. I used to be a punctual person, but I am far out numbered now and I just can't get ahead of the game. So having an egg hunt added to the schedule would not work. Not to mention I knew I would get home Late Saturday evening (I was working at a consignment sale,) so Easter preparations just seemed daunting and tiring.

I remember as a kid running into my parents room as soon as I woke-up to wake my parents so we could get to huntin'. It never seemed that early to me, but now that I am on the other side of the encounter I just have to say "I am sorry mom and dad." I woke-up to SweetPea jumping up and down on hubbs' back yelling "wake-up, the Easter Bunny came and brought baskets and ....." with a detailed list of ever item she had already found. I began to cry from laughter, until SweetPea realized I was awake and switched her attention to me. At which point I begged her to get off before she broke my bladder. I ran to the bathroom laughing so hard at the realization I was living a caricature.

We hid the eggs in the kids playroom. When I rounded the corner of entry to the room I found Bubba sitting in the middle of a circle of plastic grass and basket contents. There were plastic eggs scattered about and chocolate slobber running down his chin. I just hope I remember for next year that we need to make things a little less accessible by the children and maybe set an alarm to wake us up. Things all happened so fast I wasn't even able to get my camera. Not to mention for some reason SweetPea was running around in her underwear, so picture taking seemed a bit odd. We did find all the eggs, I counted twice. And we were still late for Church the next morning.